At the end of the 2009 season I decided it was time to build a LED Mega Tree. A Mega Tree is best described as a display item that outlines a traditional tree shape using strings of lights hanging from the top of a mast to the bottom at equally spaced distance around the base. There are many examples on the net – Mega Trees have become a basic item for most displays. Each string of light is individually controlled enabling all sorts and affects to be displayed. Generally multiple colours are used allowing more thematic displays to suit the chosen music track.
The are 4 critical components to a Mega tree:
- Dimensions
- # of Channels
- Colours
- Construction
Dimensions
Only two critical dimensions are chosen namely the Height and base diameter. A great little ap hosted at altoonalights.com has been created to help with the design. In my case, I chose 5m above the ground with an area below to add outline boxes. The base diameter ended up being 1.8 metres.
# of Channels
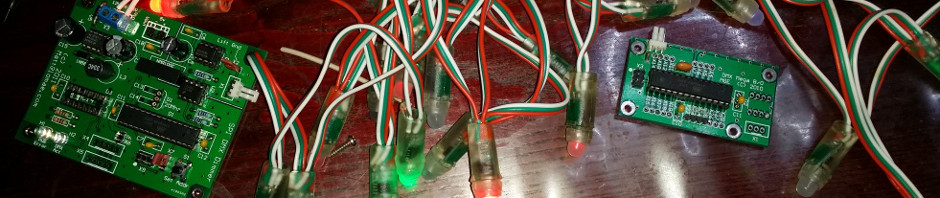
Usually multiples of 3 or 4, the number of channels depends greatly on your controller hardware, the number of light colours and the string lengths. Some trees use double length strings. What ever string length you choose, higher channel count give a more graduated control over the tree animations. I chose 3 colours of 16 channels each.
String Colours
Red and Green are definite Must Haves. Blue adds variety as does White. I am limited in what LED strings I have been able to purchase, and Red, Green and Blue.
Construction
My tree has three main components:
- some form a base
- the mast
- the crown to which the light strings attach
Welding the Base
The base serves to anchor the mast to the ground and keep it in place, and can be a very critical component. The use of guys assists with stability and allow to flimsier mast compared to a self supporting mast. I decided to use a self supporting mast. Some bases consist of a hole in the ground that the mast slips into. In the off season, the hole has a cap inserted. It is a permanent garden fixture. Other bases use a 5ft Star post or section of 25mm Rio Rod. These “shouldn’t” be permanent. however the effort to remove such a length of steel is no easy task. No matter what method is chosen, there are excellent examples on the web.
I had been toying with the idea of using a “Portable Hole”. I got the idea of the Portable Hole from Walter Monkhouse over at www.magicchristmas.org.
I came up with this design to enable me to move the hole easily. It is basically an old car wheel with a pipe stub welded to the Disk Brake Rotor. The mast slips into the pipe stub. The Eye bolts attached to the Rotor are anchor points. The eye bolts are then used to anchor the the base to 4 Reo rod pegs.
Whilst shopping at SuperCheap Autos I discovered they were selling Trailer Disc Hubs for $19 each!!!!!! How cool it was that. One local parts wrecker wanted to charge $10 for a 2nd hand one. No matter what I said, he wouldn’t budge. At first glance it looked like the Rotor main bearing OD was just a tad smaller that the OD of the Stub to be welded.
After copious amounts of grinding the mast stub OD, I managed to whack the stub into the rotor a decent amount. The stub was stick welded to the rotor using nice deep fillets. Next 4x 30mm angles were trimmed and welded to brace the rotor and stub.
I ended up not using Eye bolts. Exhaust pipe clamps were an easy solution for launching the turn-buckle fasteners. Further details can be seen the gallery below.
Welding the Crown
The Sliding Crown enables the light strings to be hoisted up the mast. This is not totally necessary, but does have some major advantages:
- String failures can easily be replaced during the season
- The mast weight is significantly smaller for set up.
Two items need to be manufactured:
- A pulley head frame to hold 2 pulleys to be mounted on the top of the mast. Provision will be made to mount additional hardware on the top of the mast.
- A crown holding all the LED Stings will be used to hoist them up once the mast in place.
When I was web searching for ideas for the crown, I clicked my way to ChristmasLightShow.com, they sell nice Easy To Build 20′ Mega Tree Kit for $249USD. That is probably a good price for a complete kit, but postage to Australia would make the kit way over the top. BUT they use a very nice mega tree hook head. Very few details are on there website, but the concept is great, so I have started adapting it to my requirements.
The crown was manufactured by making three rings 3mm thick Galvanised Mild Steel. The end result was pretty OK.
The smaller ring simply provides stability to the upper crown, 4.5mm Dia nails hold the rings apart.
As can be seen from the photos, free forming 3mm steel by hand is hard, and I suck at it. Even so I am more than happy with the final result.
I had originally intended to use 3mm Bullet head nails , but then decided to use chain links cut at 12:00 and 3:00 o’clock.
![[nggallery id=5]](http://baulkolites.com/wp/wp-content/uploads/2010/07/MegaTree1.jpg)
All this effort was totally worth it! All I am missing is a Star for the top.