A fellow country man created what he called an RGB Spinner. Check out his video here. Also Barbotte ate DIYC.com made a similar unit using Frank’s SuperStrips. You can check out his project here.
I liked the idea concept, so started to plan my version. I decided not to build a cross with a longer lower main axis, but rather stick with equal length arms. Bevo didn’t give too much away on how to construct them either but hey it can’t be too hard, especially if I MIG the frame together. I wanted to place them in front of two largish windows at the front of our house on the top floor. It was at this point I asked my wife for her thoughts and her immediate comment was, “how are you intending to store them?” Ouch- How does she do that?
So a welded frame is out of the question as storing largish items is some what challenging here. I needed to come up with a version that can easily be broken down for storage. It was time to go to Bunning’s and hunt for Ideas.
The following How-To is what I came up with. For those that better relate to pictures, you will find a photo gallery details most of the construction.
1. Dimensions
The LED strips I intended to use were similar to Bevo’s 30 LED per meter RGB Strip. I had previous purchased some non water proof version to play with and wanted to use it for this display item. The strip is 5m long, and it doesn’t take a lot of rocket science to work out if I want to use a single strip for each spinner, I will need to cut them into 600mm lengths. As is turned out a couple of sections were damaged, so I had to settle for 500mm lengths of strip. The spinner would still be 1100 mm diameter and very viewable.
2 Design
The design is quiet simple, all that is needed is 8 equally spaced lengths of tube radiating out from a hub. I choose to make the whole thing out of PVC. The radial ate 20mm grey conduit, the hub is an end cap for Storm water pipe from the plumbing section. As I wanted to be able to remove the radial, decided the best way would to be able to unscrew them from the hub. I picked up some 20mm Conduit connectors and lock nuts as well as some 3/16 x 38mm roofing screws.
3.1 Construction – Prototype 1
The first prototype used a 100mm PVC end cap with 20mm holes drilled in the lip to take the conduit connectors. The end cap side was barely long enough for the 20mm holes, so I had to mill slots in the flat front to take the nuts.
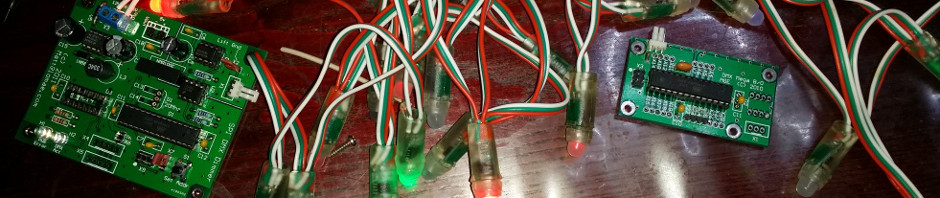
This prototype proved very successful, I thought I had the item completed and started to determine the controller type and placement. Quite often I stick the controller in an ABS box that can either be hidden out of sight or is mounted as part of the display. What ever I decided, the wiring of 8 RGB channels represented a lot of wires and connectors.
3.2 Construction – Prototype 2
After a sumptuous Sunday roast lunch, resting easy in a comfy chair, I thought how cool it would be to have the controller inside the hub. After my Sunday duties, with my 8Ch RGB controller in hand, it was off to Bunnings again, before they closed for the night!
It turns out the 150mm PVC end cap is a lot stronger than the 100mm one, and will enable the controller to be mounted inside the cap. The downside is the RGB strips are being pushed further out from the middle.
having drilled the first 150mm hub, I got to say I really like this one better. the material is about 4.5mm thick and extremely rigid. The controller is a very snug fit, with plenty of room for the twin RJ45 and a DC inlet connector between radials.
At last a test video to show some of the capabilty.
One final comment: these spinners are designed to break down for storage. I estimate the storage area for two units will 100 x 200 x 600mm, which is way cool. 😉
[nggallery id=10]