How To – Manually editing your Vixen 2.5 Profile
by Matthew Edwards – 27/10/2011
As I added 3 universes this year I needed a way to create new profile outside of Vixen. This How To details how I created the profile and then edited it using information I had in excel spread sheets about the channels and my display layout.
Tools needed:
- Vixen 2.5
- Excel 2003 to 2010 (I didn’t succeed in using Open Office for this task)
- NotePad++ ( a free down load)
Procedure
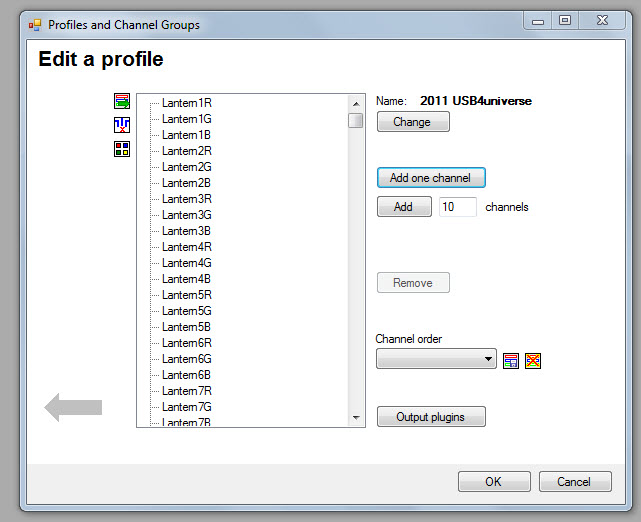
Step 1 – create the profile in Vixen with het correct number of channels and the Output Plugins
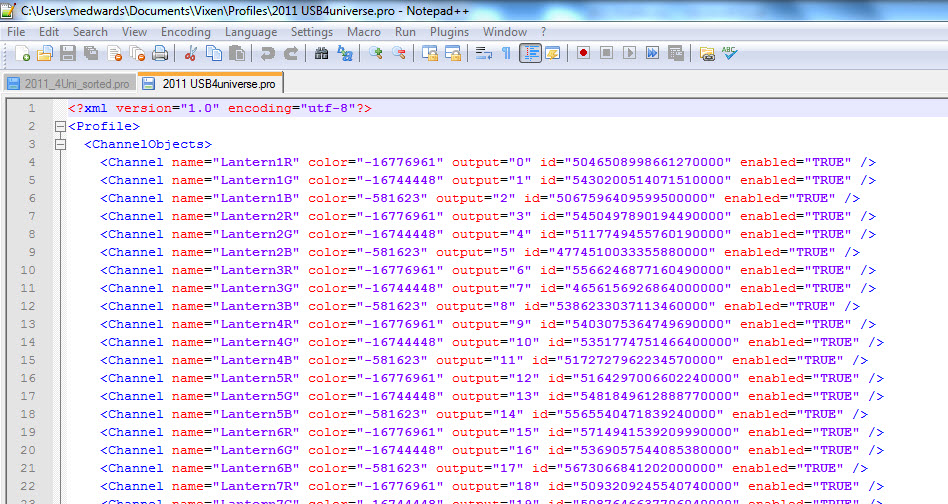
Step 2 – Open the profile with Notepad++. Change the language to XML
You will notice the channel data is defined between <ChannelObjects> and </ChannelObjects>
Select ALL of the lines between <ChannelObjects> and </ChannelObjects> and copy to the clipboard ( Ctrl C)
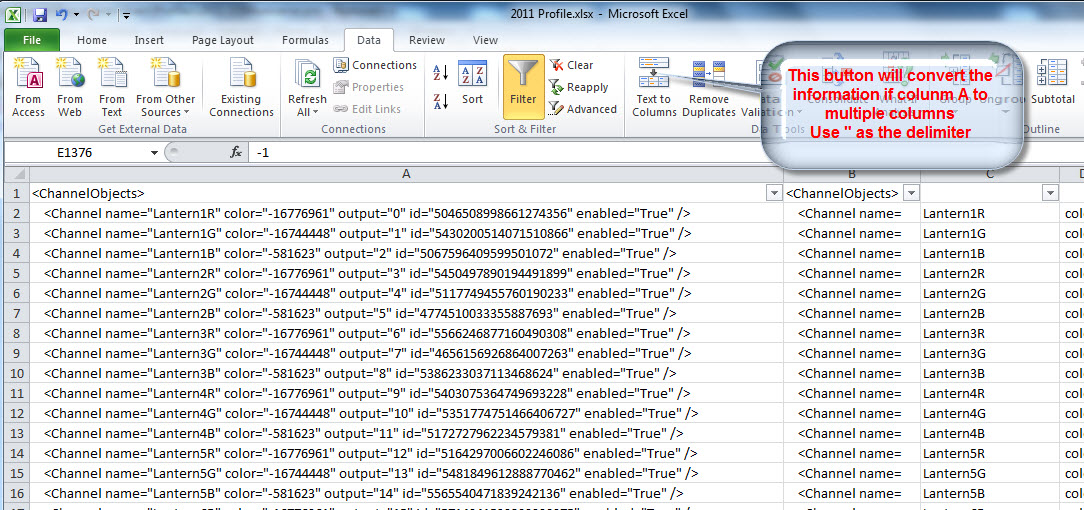
Step 3 – Open Excel and paste the lines in to column A
Now it is time to break all the channel data into manageable chunks.
Select the Text to Columns button.
Step 4 – Edit the Channel names and colours to suit your display.
I have all my channel data in OO spread sheets, so it is a simple matter of copying & paste from one to the other.
You could delete column A, but I found it useful to refer back to. At the very least you can hide the column if the page looks too busy.
Step 5 – Recreate the Channel Data objects
Basically we need to add in all the ‘ ” ’ marks we removed to create the columns and concatenate the columns into a single ASCII string.
Step 6 – Copy and paste the final string back into the profile to overwrite the existing data.


