One of the great technology waves to hit Christmas Lighting is Pixels. For me probably the most historic display was my MrPacjkethead in NZ several years ago.
I purchased a number of pixel strings add to our display. 4 years ago. Yeap that long ago. Before I get onto my own controller, the following best describe why they haven’t made it on to our Christmas display:
Observation 1 – Pixels don’t obey normal channels laws.
Each globs needs 3 channels. A string of 50 lights equates to 150 Channels. So if I were to replace my Mega tree with strings of pixels, that would equate to 16 x 100x 3 = 4800 Channels.
Observation 2 – Pixels don’t last long
The production process involved in the manufacturer of pixels means they have a tenancy for allow moisture to seep into the pixel at the wires entry. Way too many stories of people being disappointed with strings failing with the first rain fall.
Observation 3 – I am yet to see a pixel display items that have the same effect as say a Holdman Star.
Pixels are yet to wow me. Here is why I think they fail. being able to control so many channels means the normal rules for sequencing go out the door. you can no longer treat a display items like a macro unit. when you sequence a stepping notes, you used to step from Mini tree to mini trees in sequence with the music. Some mini trees had multi-colours, you may have the add “complication” of choosing a colour. that Macro was say 8 trees of 3 colours, equalling a total of 24 channels. channel them to Pixel trees of 42 pixels per tree and the channel count goes to 1008. This is an enormous problem. Some uses started to use patterns to create interesting colour effects. others used video capture. To my eye it just looked like random noise.
Observation 4 – Pixels make great TV screens
But this isn’t saying anything new, ’cause that is what pixels were designed for. But considering this should tell you how the manufacturer intended them to be used and the conditions they were to operate in. Outdoor TVs are vertical panels with the rear panel.
Observation 5 – A breed of controllers is needed for Pixel Control
One of the first guys to bring out suitable controllers was Jim StJohn of SanDevices. Check out http://www.sandevices.com/E681info.html I have two of Jim’s controllers. Currently one is used for our internal Christmas Tree.
Observation 6 – Pixels strings need Low Voltage & high current
Most pixels run of 5v and draw 20mA per LED or 60 mA per bulb. 8 strings of 42 pixels equates 20Amps. Cabling loss becomes a major issue needing special attention. Power cables need increased cross sectional area.
2 stings of pixels draw 5amps, so cabling loss can be keep to a minimum using standard Fig8 cable, see below. 10 amps will required some pretty hefty cabling. This is best demonstrated with a typical example. Assume a power cable run of 10 meters, that is the power supply is 5 meter away from the controller. And lets do s strings of 42 pixels, that is a load of 5Amdps when all LEDs are on. OK now Look at the following tables:
| Supply voltage |
5 |
Volts |
|
|
|
|
|
| Load |
5 |
Amps |
|
|
|
|
|
| Cable Run length |
5 |
m |
|
|
|
|
|
| Cable Size |
1.3 |
1.8 |
2.5 |
4 |
6 |
10 |
mm2 |
| Voltage drop |
0.765 |
0.485 |
0.4 |
0.2475 |
0.165 |
0.0955 |
|
| Voltage Drop % |
15% |
10% |
8% |
5% |
3% |
2% |
|
| Result |
No Good |
No Good |
No Good |
OK |
OK |
OK |
|
Now say we add two more strings to the same power cable. the full load goes to 10 Amps 4mm2 cable is no longer any good, we will need to upgrade it to 10mm2.
Actually 5 meter is really short. I envisage these being 10 to 15 metre. at 10 meters I will need 10mm2.
Observation 7 – Pixels power cables need to keep as short as possible
First and foremost I will state there is a certain amount of “specmanship” with this observation. Rarely are all pixels on at the same time (otherwise we buy White LEDs, right?). That said I find it is best to know the limit and then trade off for what really happens, instead of going on gut feel alone.
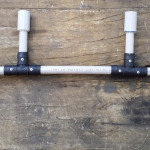
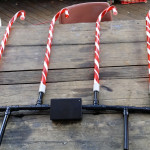
As mentioned I purchased a stack of strings in 2009 and 2010. 8 went in to service on our inside tree. 8 strings were fixed to mini tomato Trellis frames. I made these in July 2011, but have been unable to complete them sufficiently to add to the display. 8 Trees at 42 pixels equates to 1008 channels or 2 DMX Universes. Several options exist to control the trees.
- Use a E1.31 Sandevices Pixel Controller
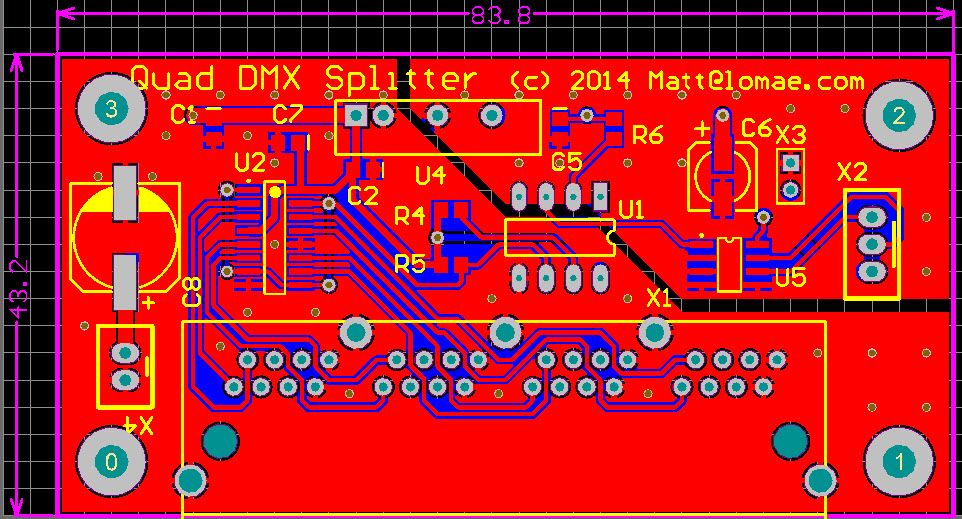
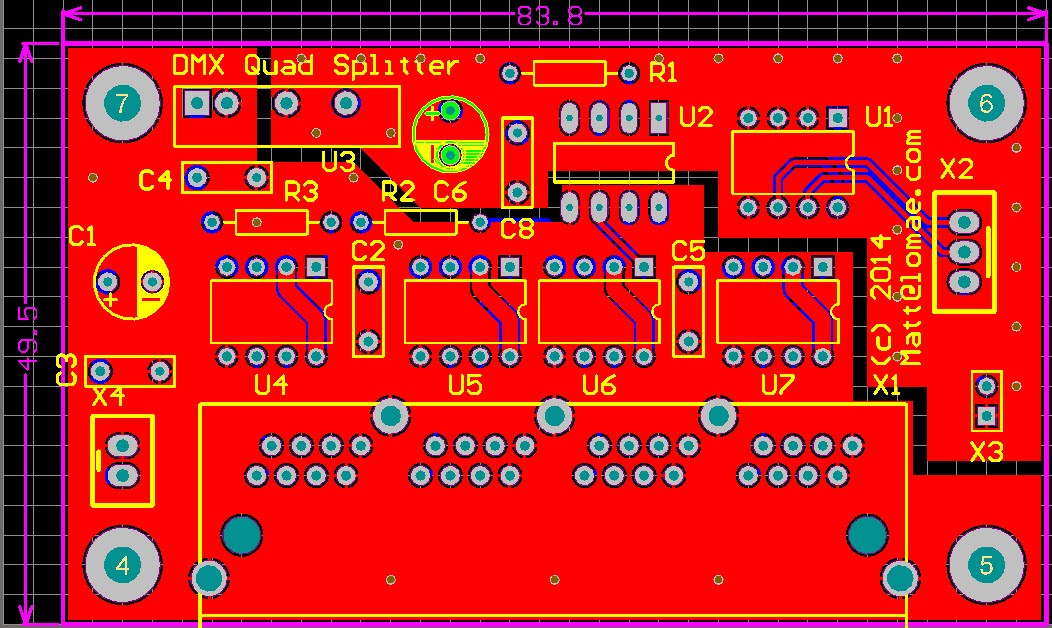
- Use a quad Pixel DMX Bridge
- Use a dual Pixel DMX Bridge
- Use a Single Pixel DMX Bridge
I decided I didn’t want to put my SanDevices E681 controller outside central to all the controllers.
So the decision came down to some form of DMX bridge, Single Dual or Quad. a single string bridge is expensive on controller costs. I opted for dual string bridges primarily because the Power Cable sizing remains manageable.
Pixels Protocols
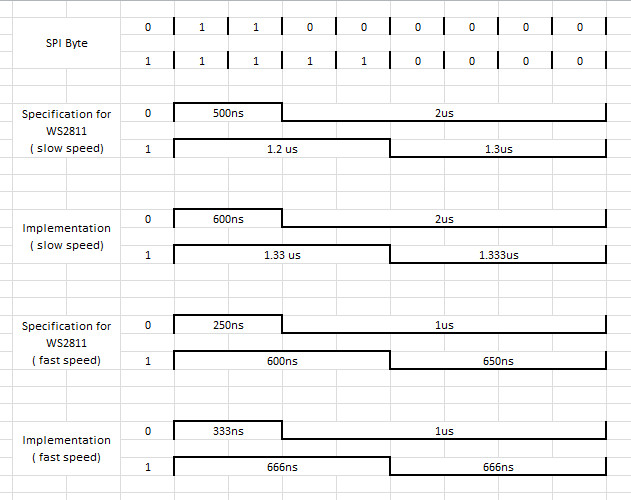
WS2811 – man this is a hard one. The specs are pretty tight. if slow mode, it uses a bit rate of 400 kbits per second. In fast mode you double it to 800 kbits per second.
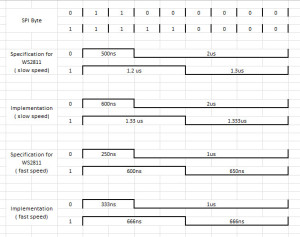
WS2811 protocol requirement
The chip seems to have a free running oscillator that is synced by a long Reset code of low for longer than 50us.
The Reset code is the same for slow and fast rates. AVRs have no way of pumping out data at these exact 400 or 800 kbits per second rates. some form of tight bit banging will be required.
6 March
The PCB have landed.
A nice DHL man visited our house today bearing gifts.
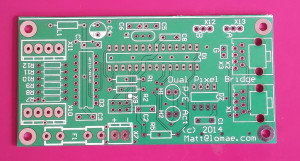
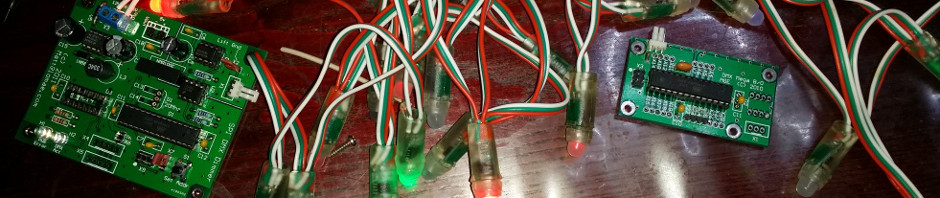
Prototype Dual Pixel Bridge PCB
12 April
Time for an Update

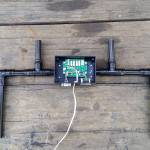
Fully Assembled Dual Pixel Bridge
As shown above, the pixel Bridge Drives either LP6803 or WS2801, but not both. I have code completed for both manually setting the Start Address in software.
Still to be completed:
Pixel BlankingSwitchless Start Address setting
You may note 2 resistors R9 and R12 are not fitted, These were added to include MacHorsehead’s mods for driving WS2811 strings. you simply need to add R9 and R12, Remove R7, R8, R19 & R11, and change G1 to 16MHz.
19 April
So I created a small routine to try the the PCB and a String.
I am using a modified version of Alan Burlison’s (alan@bleaklow.com) asm bit banging routine.
June 1st
After a little reflection, I decided I would need to set the DMX Start Address to 1 or 2 possibilities:
1 or 1+3x42x2 = 253
This is quite easy to implement in code with a single link pack. The main advantage to have a way of selecting the start address is rapid replacement if one fails.
July 20 / 21 –
On Sunday night I finalised the Address setting / Bank selecting method. I can now set up the dual bridges to start at address 1 or 253.
I couldn’t sleep last night so I got back up and worked on this some more. The Blanking option is now implemented.
It is 4:30 in the morning and the coding is now finished.
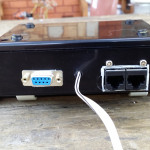
All 5 units I made (that 4 for the display and 1 spare) are mounted in Green project boxes with the RJ45 and DC power connector on the bottom. I added 2 nylon screws to line up with the Act and Pwr/Err LEDs.