4Channel Dmx DC Controller – Revisited

4Ch DC DMX Original

4Ch DC DMX Original

4Ch DC DMX Artwork

4Ch DC DMX Artwork

4chDC_DMX_Rev3_Assembled

4Ch DC DMX Controller – 1st Prototype

I have previously designed and built a 4 channel DC DMX controller. This controller has served well. But I needed to do a quick update for some display items.

Firstly I needed to add RJ45s.  They take  up a lot of real estate.

Second, I wanted to add a simple Molex connector

Thirdly, I wanted 5.5mm DC Power Barrel connector for Power in

Fourth, I updated the fuse to the Mini Auto blades

Fifth, I decided to look for some smaller devices and have been taken with the DMN6040SSD-13 yu Diodes Incorporated.
In short, the specs are:

Dual N-Channel, Vds=60 V, Id=4.4 A & Rds On =55 mOhms (Vgs =4.5V)
Package/Case: SOIC-8

Finally I wanted to try a reed switch as the way of changing the Start address. To arable this, X8 and X9 were added.

That pretty much wraps up the change

BTW I can already see some more changes. Some of the Text is mirrored. that is what happens when you have components on both sides.
I reckon I might swap the location of H1, H2 and C6

Posted in Uncategorized | Comments Off on 4Channel Dmx DC Controller – Revisited

8 Channel RGB LED Flexible Strip Controller – Revisited

I have previously designed and biult a 8 channel RGB strip controller.  This controller has served well.  But sadly the output transistors have gone End of Life.

Artwork Design

Artwork Design

I did two things to rectify this situation, I found a replacement device and ordered 500 to try out.  I also decided to look for some smaller devices and have been taken with the DMN6040SSD-13 yu Diodes Incorporaate.
In short, the specs are:

Dual N-Channel, Vds=60 V, Id=4.4 A & Rds On =55 mOhms (Vgs =4.5V)
Package/Case: SOIC-8

DMX_8ch_LED_Rev4_Assembled

1st Prototype


I also added a couple of fuses , Rj45s and dropped the switch mode power supply for a simple linear.  For 12Volt operation this is fine.  for higher voltages, I will change the LM7805 to Murata Switcher.


– Now to test the unit.

Posted in Uncategorized | Comments Off on 8 Channel RGB LED Flexible Strip Controller – Revisited

DMX Terminations

DMX512 employs RS-485 differential signaling at its physical layer.  DMX512 uses a unidirectional simplex communication protocol.

the following is a paraphase from Wiki:  DMX512 is a bus network that works upto 1,200 metres long, provided you don’t have  more than 32 receivers on a single bus. If more than 32 recivers are needed in a single universe,  it can be expanded across parallel buses using DMX splitters. DMX wiring  consists of a shielded twisted pair, with a characteristic impedance of 120 Ohms, with a termination resistor at the end of the cable furthest from the controller to absorb signal reflections.    Go read some more here.

Wiki also has a realy good graphic Simple DMX Network Bus

Traditionally the christmas lights fraternity add DMX terminators to each controller withe link pack to select the terminator if it the the last one on the bus.  I have added thenm to most of my designs too. For example X10 on my 8Ch DC Controller.

But here’s the rub.  I never fit the link packs.  I too lasy. and then I forget which one has the terminator installer.  So I so a for more visual termintator.

These terminators are a cinch to make and are pretty reliable too. the cost is super good.  the last lot cost me 6.5 cents each.

Material:

  • RJ 455 plug
  • 120 ohm 1/4W Resistor (1/8 W also work)
  • scrap Cat 5 wire insulation
  • hot glue ( optional)

Proceedure:

  • Bent one end of the resistor lead back over the body of the resistor.
  • Place the resistor on the outside of the body with the two leads alnign with the pins.  You want the body of the resistor to be just an the end of the pins.  Trim the leads.  I trim mine to XXmm.
  • Add some scrap Cat5 wire insulation to the resistors leads before inserting hte resistor in the connector housing and crimping.
  • Once your done, your can add a blob of hot glue or silastic the seal the end.

Just a coupleo of notes:

  1. 1/8W and 1/4W resistors are small and have 0.4mm diameters leads which is a tad smaller than Cat5 (0.51mm)  the body is also small enough to fit inside the connector housing
  2. There are two types of connectors dependant on your cable type, solid or stranded cable.  Try and purchase some connectors suitable for solid wire for this project.


Posted in DMX, Light Controllers, Other Hardware | Comments Off on DMX Terminations

Finally Affordable Snowfall Tube rebirthed

FAST was created by Cory Helmuth as a inexpensive snowfall or meteor tubes. Snowfall tubes are long clear plastic tubes that have a group of LEDs arranged in a linear fashion and the LEDs light in a sequential manner from the top to the bottom. The visual effect looks like a bright snowflake falling down. The FAST consists of a FAST Controller PCB that drives 1-8 LED Segment PCBs each with 7 LED’s per segment for a total of 7-56 SuperFlux LED’s. Based on the number of LED Segment Boards used, the snowfall tubes can be between 12″ to 48″ in length.
The FAST is designed using a concept called Charlieplexing.  Charlieplexing, in its simplest form, works using a matrix of complementary pairs of LEDs. This allows a large number of LEDs to be driven by a small number of I/O pins from a PIC microcontroller. In the FAST, 56 LEDs are controlled using just 8 connections!

Check out full details in the Wiki over at DIYC.com

I purchased a number from the guys at diyledexpress

I found the controller PCB too big to fit in the tube I sourced, so had to repurpose the Controller PCB.

Initially I used strip board to.

Eventually I decided a small PCB would make things tad  easier.  This article details how I progressed.

Posted in Uncategorized | Comments Off on Finally Affordable Snowfall Tube rebirthed

RGB Window Outlines

Window outlines are a popular display items. They accentuate the house beautifully.
There are two things you’ll discover when installing windows lights – String length might be a problem, and tape won’t hold them. Whether you’re putting lights up inside or outside your windows, there are solutions available on the net.
I used Rope light for a number of years, but they tend to droop in the middle and the corners end up rounded.
This year I am adding a more officiated design that uses RGB LEDs.
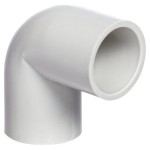
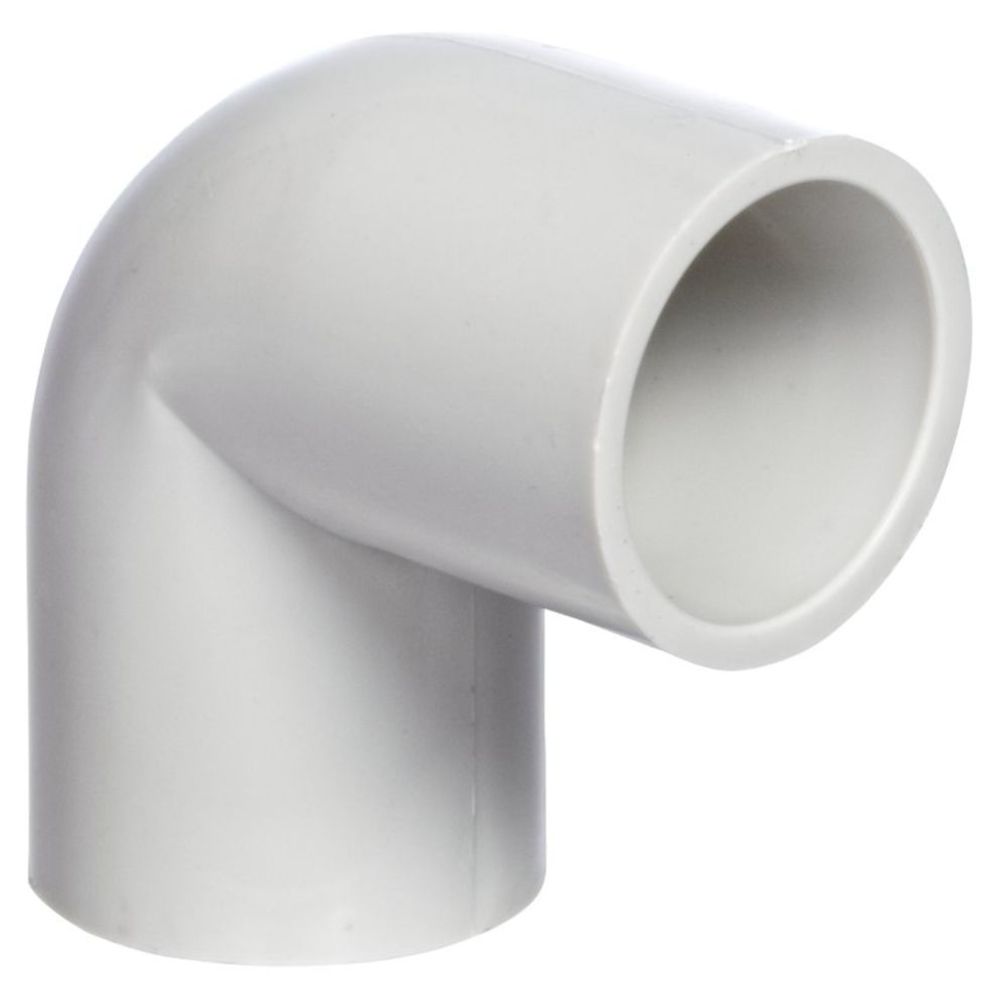
20mm Tigh Elbow

20mm Tight Elbow

The main concept is to build a free standing frame that sits inside the brick surrounds of the window. I discovered Air-conditioner tight elbow at my local electrician supply shop. These elbows are usually used for removal of the condensate on hot days. They also make straight tees too. And they fits normal light duty conduit.

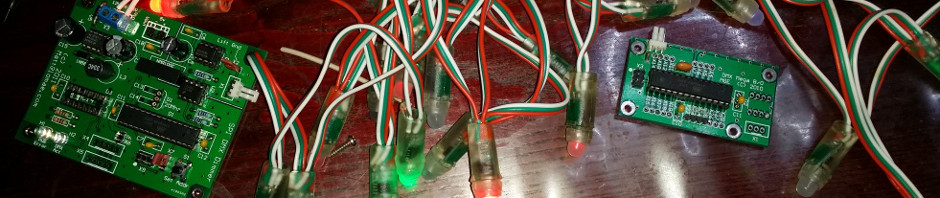
The RGB LED strip was purchased from AliExpress.

These are the actual ones I purchased.  I scored them on sale as great sale.

These Window outlines are designed to be completely dismantled for storage.
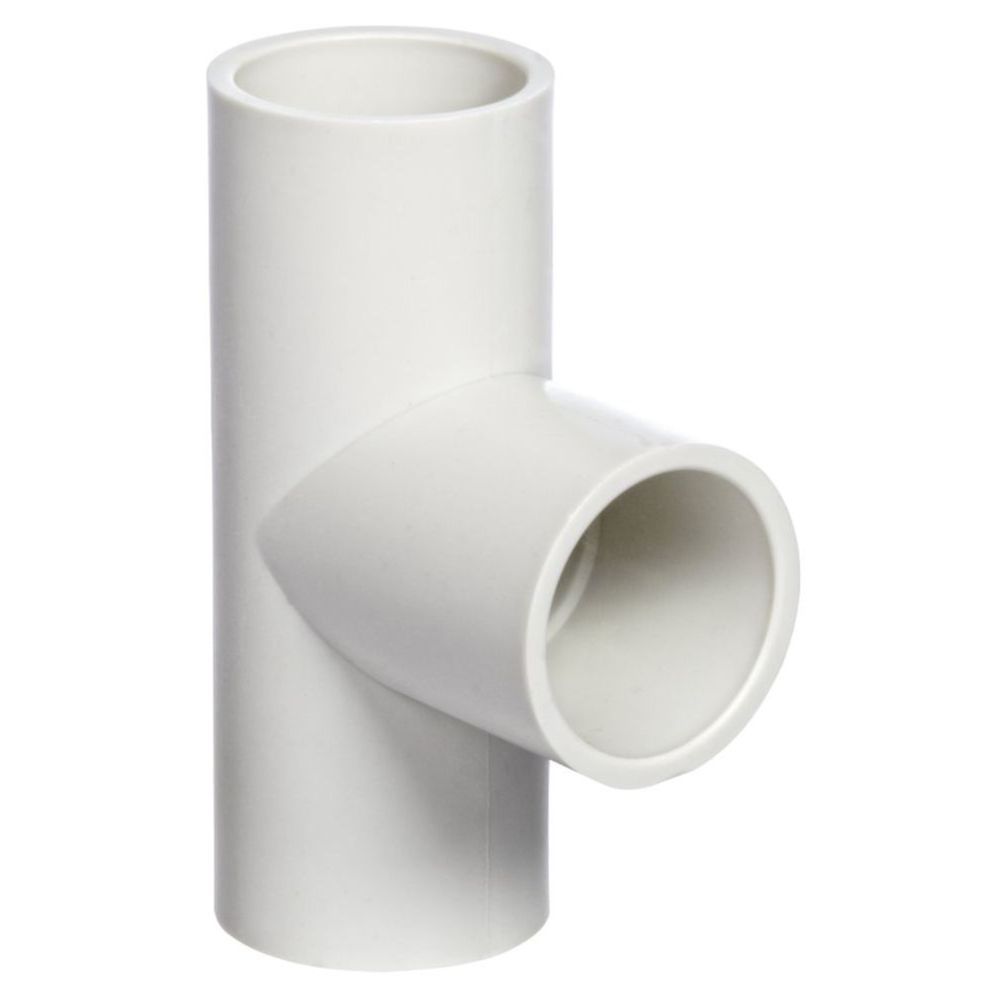
20mmStraightTee

20mm Straight Tee

Material List
20mm Light Duty Conduit
20mm Tight Elbow
20mm Straight Tees
40mm Clear HeatSrink
Non-waterproof RGB Led Strip
RGB Strip connector tails
Spray tin of PCB Laquer
1m x3mm Bungee cord
3mm Polyester cord
3mm wire

Method I used

Measure the window opening and subtract 10mm.
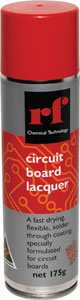
PCB lacquer

PCB lacquer

Take conduit offcut and grease up the outside. Place conduit into the elbow.  Measure the distance from one edge of elbow to the other.  My elbows measure 45mm.  Remove the conduit and measure how far the grease smeared up the conduit, in my case it was 20mm.  This means I needto subtract 25 +25+10 mm = 60mm shorter than the window measurements

Cut 20mm conduit to length to suit the window less 60mm.

Carefully unroll the RGB LED strip and trim to maximise the lead.  Remember you need to allow 20mm that slides in the elbow.

Solder the RGB 4 core tails to both ends of the strip.  Apply the PCB Lacquer onto the LED strip.

Now the Fun Starts.  Sliding the clear  heat shrink over the conduit and LED strip can be difficult.  However after the first attempt, I discovered applying a very very light amount of Olive oil on the back of the conduit made life extremely easy.  I dip my finger in extra virginal oil and smear it on the back.  I only dip my finger twice over 2 metre of conduit.  I just keep running my finger up and down the conduit .  The clear heat shrink glides on.

When the sides have been completed, it is time to do a trial run installation.  All is good, Yes?

As stated previously, I want to store these completing broken down. This means I need a mechanism to hold them together for the whole season, I decided to use bungee cord inside the conduit.
I use 3mm bungee cord to keep the frame together. Measure the frame perimeter. cut the cord to the perimeter less 1.5meters. Knot a loop on one end. Tie a 1 metre length on bungee cord to the other end. Add a hook to the other end of bungee cord. Using 150mm of 3mm wire form a “U” there will slide into the conduit. Bend 30mm of the wire ends back on itself to prevent the hook sliding completely into the conduit. Hook the cord on the wire hook and feed the bungee cord and rope cord into the conduit and elbow pieces. the last bit is a bit tricky, you need to extend the bungee out of the far end and hook on to the cord.
See below for a photographic record of construction.

Posted in AVRs, Display Items, DMX, Light Controllers | Comments Off on RGB Window Outlines

Mini Pixel Trees

Spiral Planter Cage

Spiral Planter Cage

Based on 900mm Tomato Cage frames and 42 LP6803 Pixels, these trees have been a very very long project. The project started almost 6 years ago when I purchased for plant trellis cages from the local nursary, for the garden. Every time I looked at them in the garden I thought it would be cool to purchase some more. after about 6months I head back to place an order to 8 more cage, only to be told I was mistaken, I could’ve purchased them from them, cause they have only every sold 1200 and 1500mm cages. Well Bugger me I said, (on second thoughts may be not). Proud to say I haven’t been back to that local nursery. But I did note the manufacturers name on the 1200mm cages. Within 2 months I took delivery of 8x 900mm new cages, sporting the new colour range of mucky brown, directly from the distributor, who was only too happy to supply them directly when I explained what happened.  He even ventured to suggest he wasn’t surprised!.

These are my materials used:

  • 900mm obelisk Spiral plant supports
  • 1x Pixel string, I used 42x pixels with LP8603 for these
  • 2m x 4core 14/2 alarm cable
  • 1x 4core pixel tail
  • 100s of UV stable cable ties
  • 1/8″ wire to extend Spiral

See the photo gallery below for construction details. Note the manufacture of the cages didn’t continue the spiral all the way down to the base. I found it necessary to add a small section of 3.2mm wire to complete the spirals.

I also glued some Star Plugs onto the cage ends to prevent them from sinking into the ground.

So that is that.


And here is a video running a static RGB Fades

Posted in Uncategorized | Comments Off on Mini Pixel Trees

The Falcon Pi Player and a Real Time Clock

The FPP only has two option for RTC. A Rasclock and a DS1305. None of these seem to be available here in Australia. Bummer!

But SunFounder DS3231 RTC Real Time Clock Module seem to be all over Ebay for a couple of bucks.
DS3231rct1

DS3231rct2

Even DX.com sel;ls them http://aud.dx.com/product/ds3231-raspberry-pi-rtc-board-real-time-clock-module-for-arduino-black-961277258#.U3VmhCiBtuY
They are tiny. And these guys have got them going on the Pi
http://nicegear.co.nz/blog/using-an-i2c-real-time-clock-rtc-with-a-raspberry-pi/
So I will try also.

Posted in Uncategorized | Comments Off on The Falcon Pi Player and a Real Time Clock

My journey with the Falcon Pi Player

I finally made some time to start pulling my FPP together.
My goal is two fold – l prepare how I will play my Christmas lights this year, and learn some more stuff.
My current configuration ( what I had available)

  • Several new 4 and 8 GB Sd cards ( one cam loaded Rasbian OS \ great for proving the Pi boots)
  • A Rev B Pi
  • 4 port Powers USB 3.0 Hub
  • a Lenovo N5901 Mini Keyboard / Track ball
  • a Small 7″tft Analog display
  • I am waiting for the USB WiFi adapter to arrive ( I chose one for the list of known working units over at http://elinux.org/RPi_USB_Wi-Fi_Adapters)
    I need to purchase another Wireless Mouse Keyboard that is more compatible. But for now that can wait.
    So I followed the instructions to create the SD card at http://falconchristmas.com/forum/index.php/topic,483.0.html. (MyKroFt’s Instructions are straight forward and clear). For the dummies out there like me, you copy the contents on the of the Zipped Folder not the unzipped folder to the SD Card.

    So I connected all the hardware together as so:
    USB Hub powered the PI ( I only want a single Power supply.)
    The monitor is connected to the RCA analog port on the PIWireless keyboard is connected to USB Hub

    On Power up the Green LED flashes but the screen remains blank to a loon time. But then Surprise Surprise the screen started scrolling text. Yippee!
    Then the Falcon Christmas Splash screen popped up.
    It the disappears to a blank screen.

    So that is my first baby steps. I am happy to be starting the journey.

    the Next Step – WiFi
    Getting Wifi going Was easy.
    First purchase a recommended USB adapter. This is a good place to start:
    http://elinux.org/RPi_USB_Wi-Fi_Adapters

    I followed there instructions to install the dongle:
    http://falconchristmas.com/forum/index.php/topic,309.msg1975.html#msg1975

    Putty to the pi and

    List the USB devices
    lsusb
    Your Wifi Dongle should be there – if not seek help from a non noob. 😉

    Have look at some information from a wireless network interface

    The last thing I did was read all the IP addresses on the Pi
    sudo ip addr show

    So there you go. In my case I was then able to type in the IP address of the Wifi and access the FPP home page.

    WiFi Continued
    So I discovered today if I reboot the Access point the Pi is connected, the Pi doesn’t connect to the AP when it is back up.

    This will need to be parked for the time being As I am unsure where to go with this issue.

    Posted in Uncategorized | Comments Off on My journey with the Falcon Pi Player

    Handling Errors

    My controllers use two LEDs to indicate controller status.
    H1 – DMX Activity flashes to indicate DMX data has been received and processed.
    H2 – Power / Error is on to indicating Power is ON and there are no errors.  H2 flashes various patterns to indicate the type of error.

    The change of a relevant channel is indicated by a flashing green LED.

    flashing DMX data has been received and processed. Normal Operation.

    The red LED repeats error codes until cleared:

    Pattern Error Solution
    flashing There is no signal connected to the transceiver. Connect the transceiver to the DMX bus.
    double flashing The received signal is not DMX. Try swapping D+ and D- at the DMX connector.
    triple flashing Future Functionality. N/A.
    constant on DMX received and no errors.  Normal Operation

    This error indicator is easily implemented with the following code:
    void indicate(void) {
    static uint8_t count;
    if (++count >= 10)
    count = 0; // reset every 5 secs
    if(Blink ==0) CLEAR(H1);
    else if (count <= Blink)
    TOGGLE(H1); // toggle LED
    }

    Each error condition is given an unique Odd number.
    The LED Flash period is set by an timer overflow.

    Posted in AVRs, DMX, Light Controllers | Comments Off on Handling Errors

    I swear

    I am a husband, father, son, brother and a friend. Today I took the oath to Love, cherish and protect all women I come in contact with, starting with the ones closest to me.WhiteRibbonAustralia_CampaignFBCover

    Posted in ramble | Comments Off on I swear