I have a small 7litre oven that works a treat for Reflow of small boards.
I recently upgraded to a 20 litre oven with two element top and bottom. Rated at 1500Watts, there is able power to heat the area.
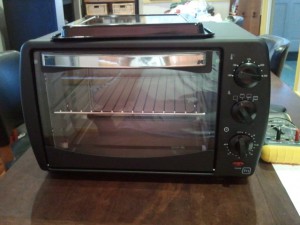
Front Shot of 20litre Oven
Having run the oven a couple of times manually I have concluded the following:
- The Temperature setting is a waste of time. it appears to be a simple bi metal switch and not a thermostat.
- The top needs some form of Insulation as the top lid gets really really hot.
- The Rack inside the oven is not attached to the door – bonus as far as I am concerned.
- I need to come up with some form of automated venting to cool the boards down.
- I may be able to fit another shelf and increase the throughput ( I am looking for some AL material with a 5mm grid of 5mm holes).
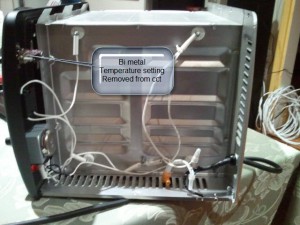
Simple Layout
An interesting note: the top elements are connected in series, as are the bottom elements. This is quite nifty as there is no need for a neutral return.
For now I will leave the oven as is that start the Controller.
I have been playing around with the Arduino IDE with the intention of teaching my girls Control theory. I have decided I would use this environment to develop the Oven Controller.
Maxim make a brilliant, if not slightly pricey Type K thermocouple digitises. it uses the SPI interface. ryanjmclaughlin has created an Arduino Library for the MAX6675.
Brett (aka br3ttb) had created a PID Library – Some may say all the fun has gone. Well maybe, but I still get to pull their work together and make my oven how I want it. I will be adding an LCD to give feedback on where you are in the cycle. Graphic would be super – otherwise 2×16 will be OK.
Update 1
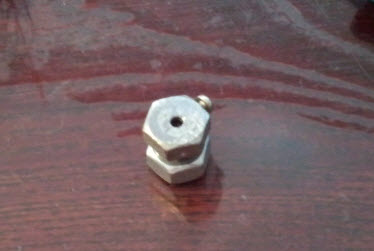
Thermocouple Nut
Found an old thermocouple from a previous Jaycar project. The Type-K thermocouple is constructed with a 3.2mm Diameter Stainless Steel barrel and is an exact match for the MAX6675 for testing. I am not sure if this will be the final one I will use but for now it will suffice.When I was in the workshop, I realised how easy it would be to make a mounting nut for the thermocouple. Starting with a 3/8W bolt, I drilled a 3.2mm hole through the middle. I then drill a pilot hole in one the bolt head flats and tapped it with ISO M3.
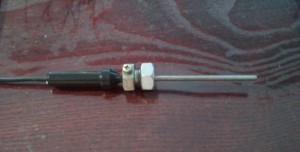
Thermocouple with Nut installed
The MAX6675 performs cold-junction compensation and digitizes the signal from a type-K thermocouple. Direct
The data is output in a 12-bit resolution, SPI™-compatible, read-only format.
This converter resolves temperatures to 0.25°C, allows readings as high as +1024°C, and exhibits thermocouple accuracy of 8LSBs for temperatures ranging from 0°C to +700°C.
- Digital Conversion of Type -K Thermocouple Output
- Cold-Junction Compensation
- Simple SPI-Compatible Serial Interface
- 12-Bit, 0.25°C Resolution
- Open Thermocouple Detection
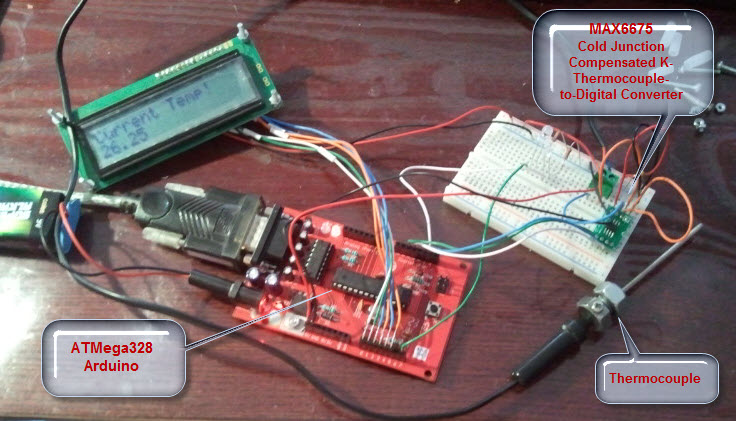
K type Thermocouple based Thermoneter
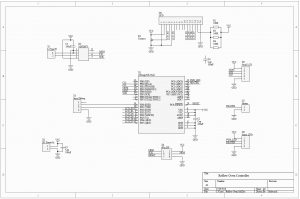
Whilst I await a Solid State Relay to come in, I have stated looking at the final schematic. I have allowed for two LCD modules. Currently I am testing in 4bit parallel mode, but would like to try a 3wire SPI display. the final design will only have a single display.
Follow features have been included:
- Nokia cable USB debug port
- Soft Power LED
- Heater Status LED
- DC Power supply requires attention
- Off board Solid State Relay – I am looking for a “Puck” type
- Emergency Stop to be implemented, either contactor or uController Interrupt


